12/14/2021
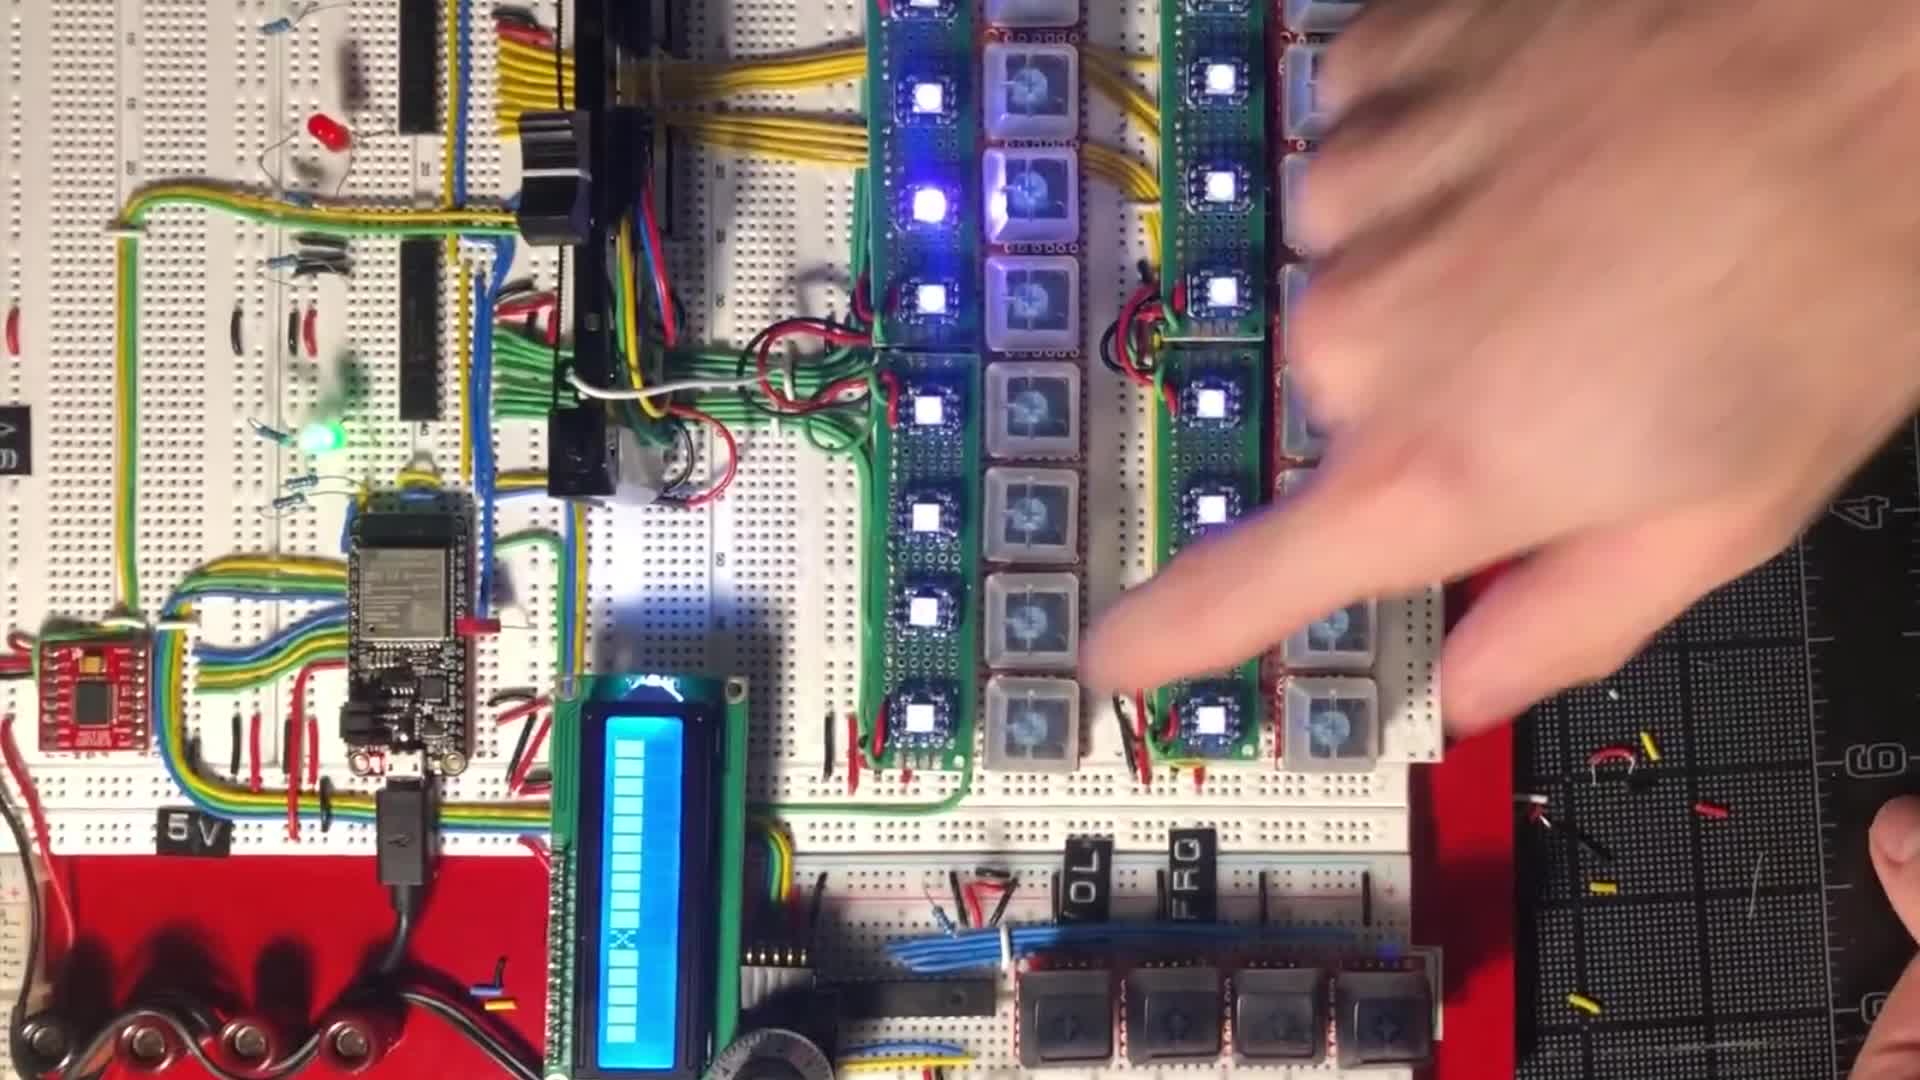
Sequins Hardware Prototype
A detailed build log of the Sequins Hardware Prototype, a custom looper and step sequencer with embedded audio, tactile controls, LEDs, and a motorized fader.
Read article »12/14/2021
A detailed build log of the Sequins Hardware Prototype, a custom looper and step sequencer with embedded audio, tactile controls, LEDs, and a motorized fader.
Read article »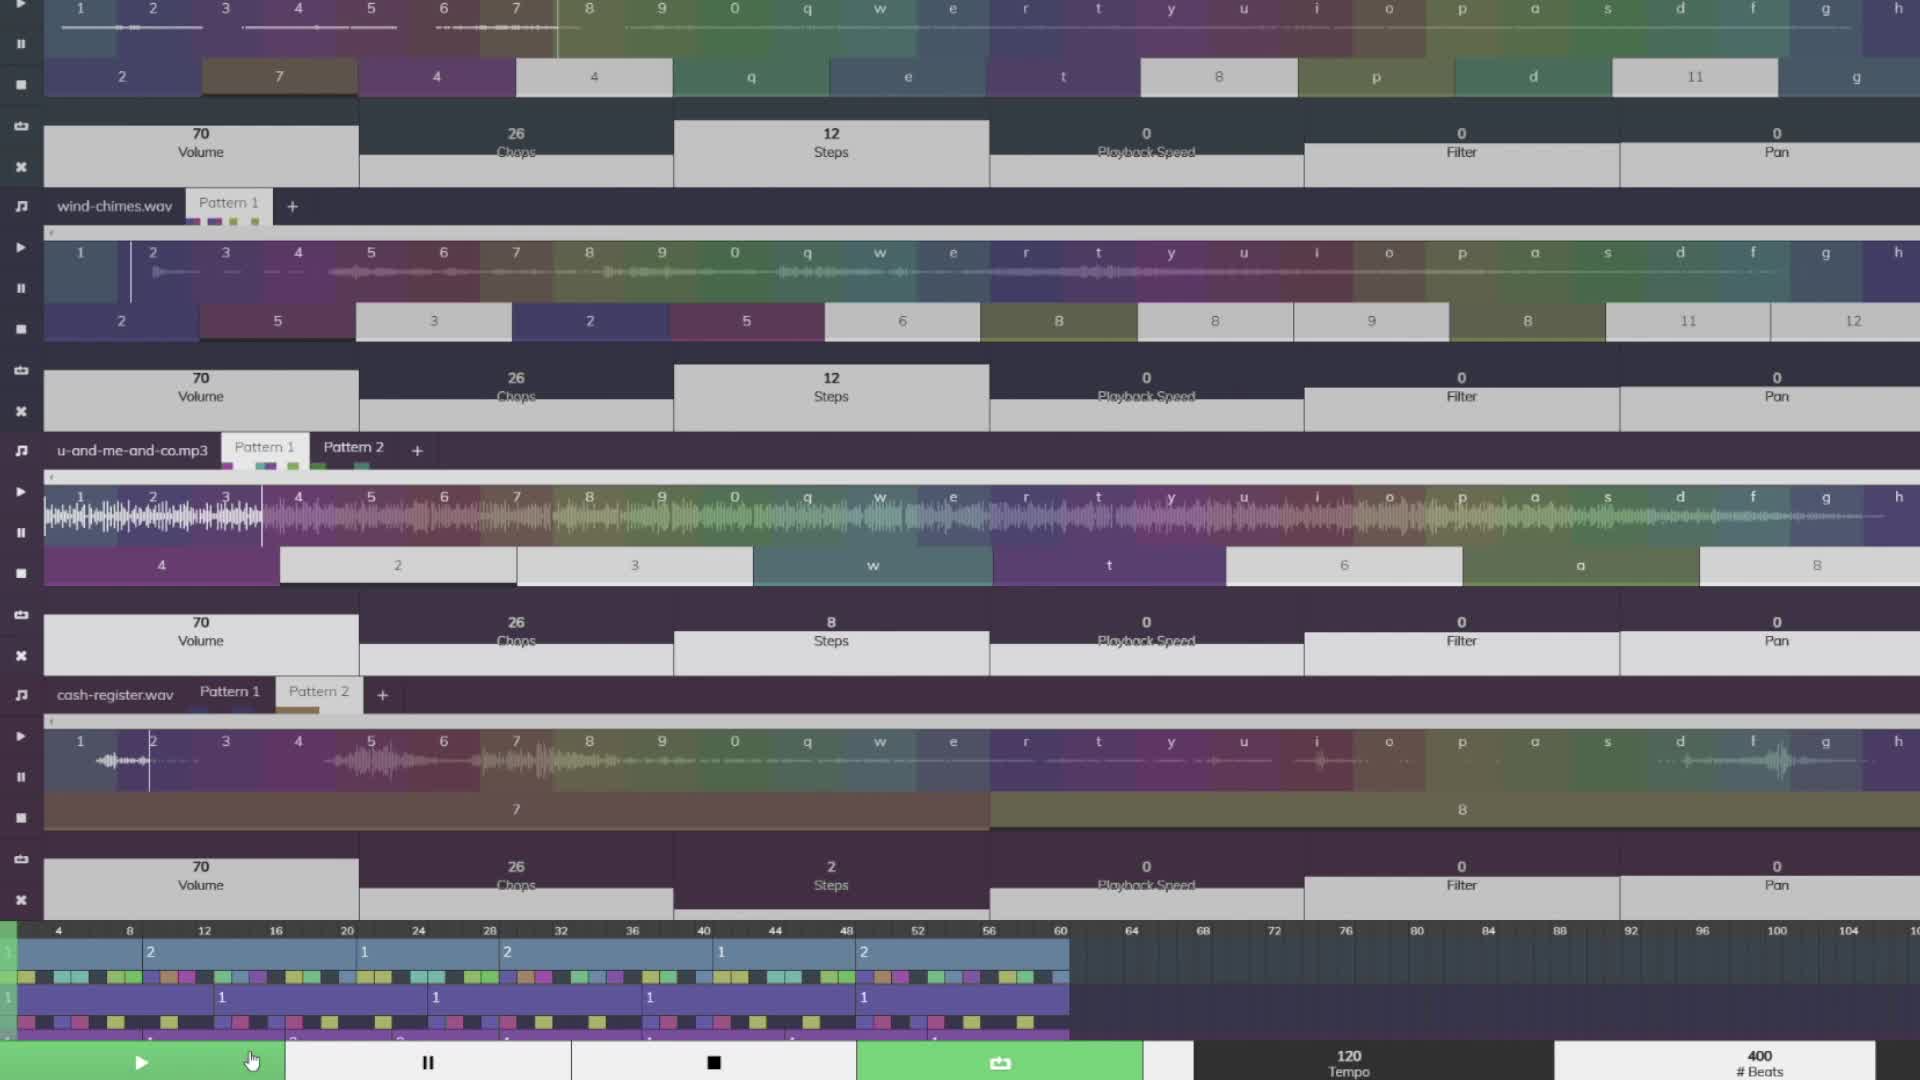
12/14/2021
A detailed build log of the React and TypeScript Sequins Web Prototype, a browser-based audio slicer and sequencer created to validate a hardware instrument idea.
Read article »